eSIM, Device Compatibility
How to Install an eSIM on iPhone 14: A Complete Step-by-Step Guide
Includes QR code, manual setup, and carrier activation methods.
It is a straightforward process that can be completed in just four simple steps.
- Get Your eSIM Ready: Obtain the eSIM information from your mobile carrier.
- Add the eSIM to Your iPhone 14: Use your iPhone 14 to scan the QR code or manually add the information provided by your mobile carrier.
- Activate Your eSIM Plan: Follow the on-screen prompts to activate your eSIM and select it as your primary or secondary line.
- Configure Your eSIM Settings: Customize your preferences for calls, messages and data for your new eSIM.
This easy to follow guide will show you step-by-step how to successfully set up and activate an eSIM on an iPhone 14, even if you are using one for the first time. Read on for more details.


Preparing Your iPhone 14 for eSIM Installation
Before installing an eSIM, it's always a good idea to update your iPhone 14 to the latest software version. This helps avoid compatibility issues and ensure a smoother eSIM installation process.
How to Add an eSIM on Your iPhone 14
There are four main ways to install an eSIM on your iPhone 14: by scanning the eSIM QR code that is provided to you by your provider, or by entering the eSIM information manually.
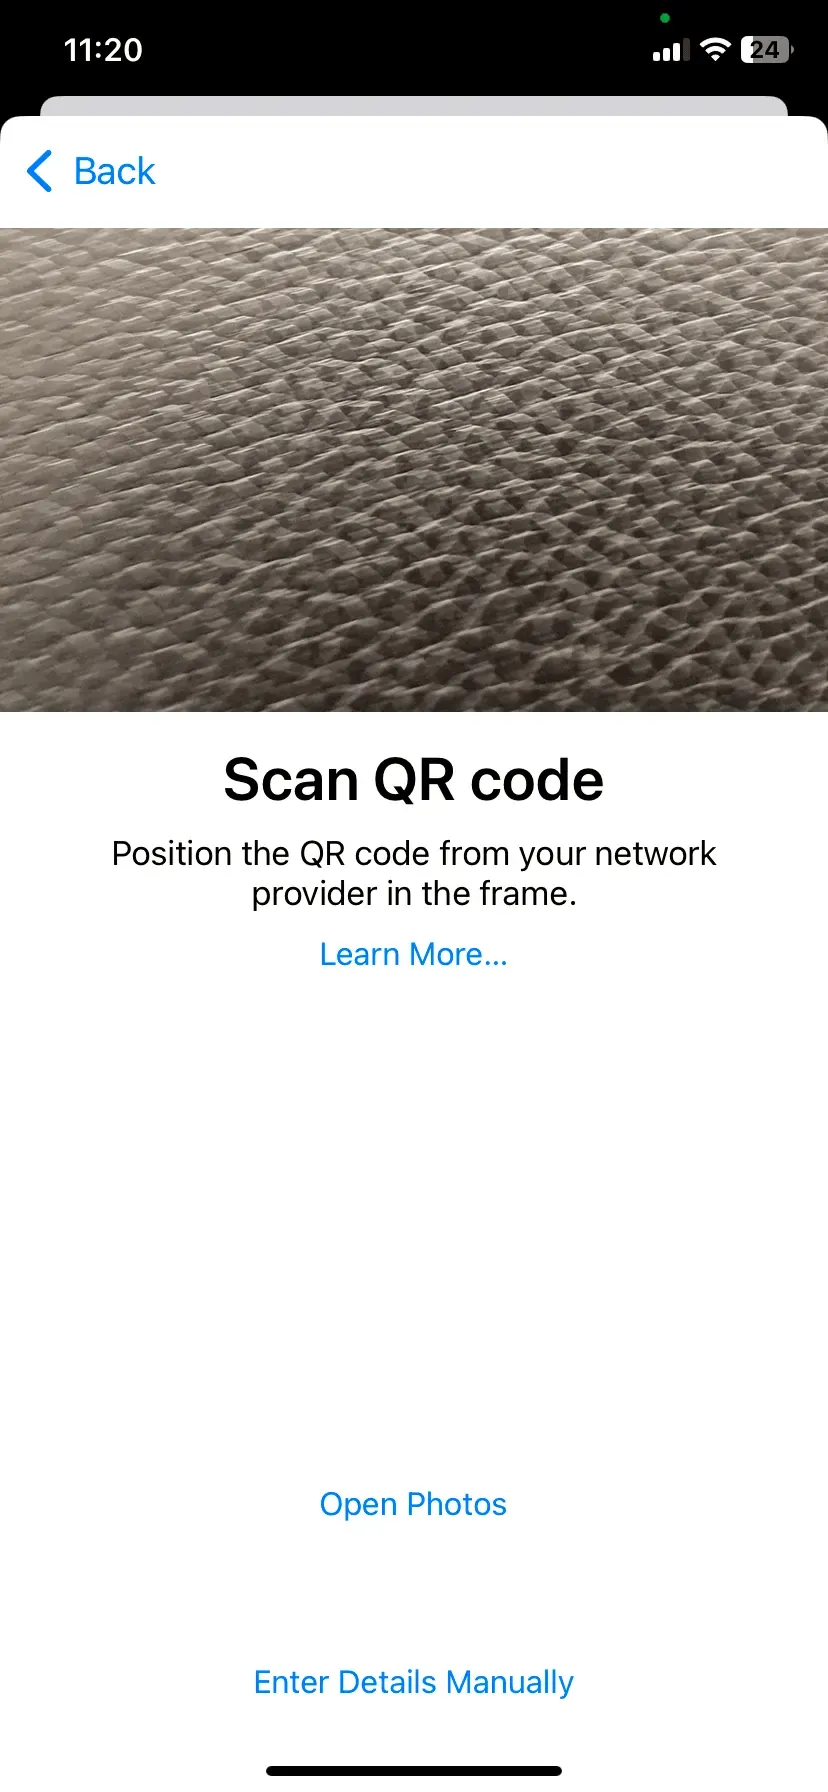
Method 1: Scanning the eSIM QR Code
Let's start with the easiest method - scanning the eSIM QR code. To do this, simply follow these steps:
- Go to Settings > Mobile Data > Add eSIM
- Select 'Use QR code'
- A new window will appear, prompting you to scan the QR code provided by your carrier.
- Follow the instructions on the screen.

Method 2: Entering eSIM Information Manually
But what if you don't have an eSIM QR code? Or perhaps the scanning process isn't working? Don't worry, you can still manually enter the eSIM information and get your plan up and running.
Your carrier will provide you with all the necessary details, such as the SM-DP+ address, activation code, and any other relevant information.
- Go to Settings > Mobile Data > Add eSIM
- Select 'Use QR code'
- A new window will appear, prompting you to scan the QR code provided by your carrier. Select 'Enter Details Manually'.
- Enter the necessary details and follow the instructions on the screen.
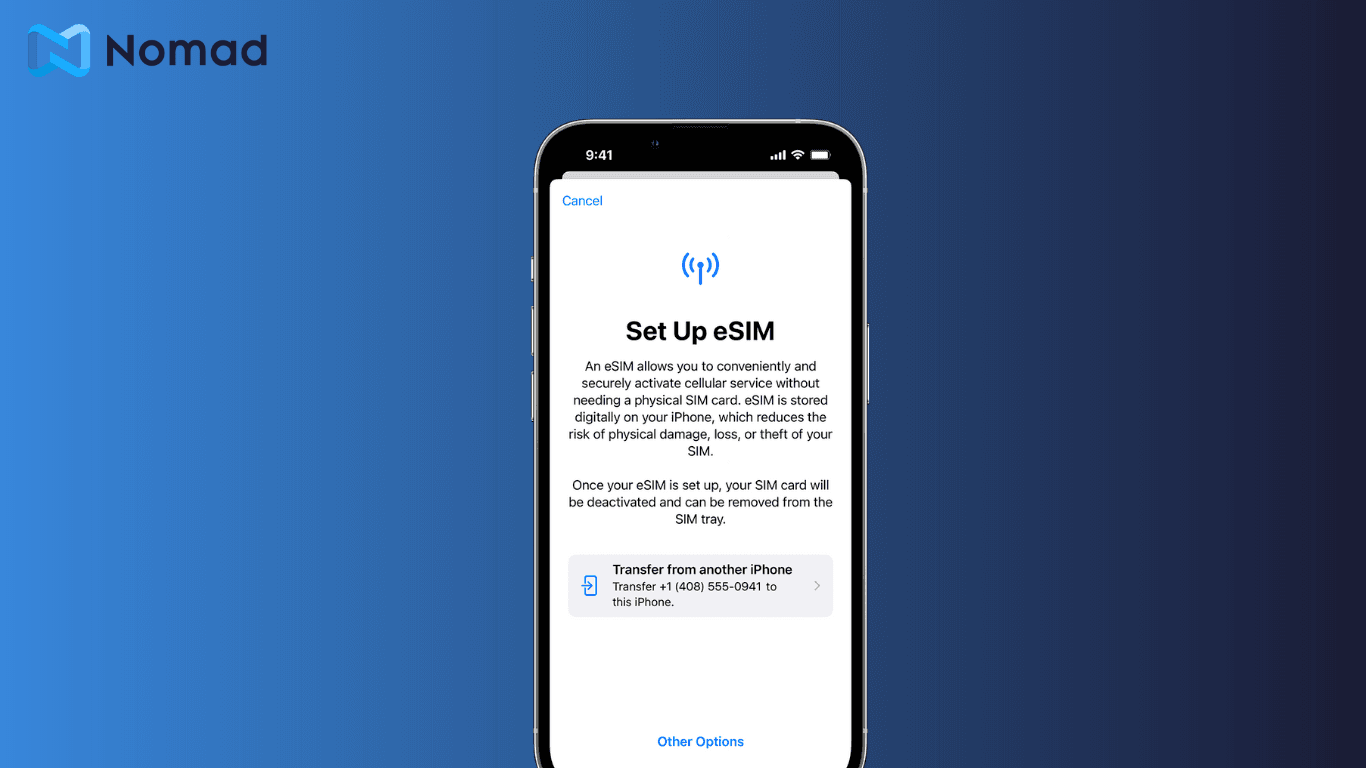
Method 3: Use Apple’s Quick Transfer function (from another iPhone)
This method works best for switching between iPhones. Note that both devices must support eSIMs and are running on iOS 16+.
- Go to to Settings > Mobile Data > Add eSIM
- Select 'Transfer From Another iPhone'
- Ensure your previous iPhone is nearby, unlocked, has Bluetooth enabled, and is running iOS 16 or later. Follow the prompts that appear on both devices.
- Confirm the transfer on your previous iPhone by tapping 'Transfer' or entering a verification code if prompted.
- Wait for your iPhone 14 eSIM to activate. Once done, the eSIM on your previous iPhone will be deactivated. You may need to follow a link to your carrier's website to finalize the setup.
Method 4: Carrier Activation (Postpaid Plans Only)
If you’re not sure how to add an eSIM to your iPhone 14, you can opt for carrier activation. This is a process where your mobile network provider sets up your iPhone 14 eSIM for you. This is typically an option for postpaid plans where your account is already established with the carrier. Instead of manually entering details or scanning a QR code, the carrier handles the eSIM configuration remotely.
Although the specific instructions may differ from carrier to carrier, here are the general steps for the process:
- Contact your carrier and provide your iPhone 14’s IMEI
- The carrier will then initiate the eSIM activation process on their system, which may take a short while.
- The carrier may send you a QR code or download link. Follow the instructions provided and your phone should automatically detect and prompt you to download the activated eSIM profile.
- Ensure the eSIM is working by making a test call or using mobile data after activation is complete.

Setting Your Cellular Plan with eSIM
Now that you've successfully installed the eSIM on your iPhone 14, it's time to set it as your primary cellular plan. This step ensures that your device uses the eSIM for your cellular connectivity. To make this adjustment, go back to the Mobile Data menu in the Settings app. You'll see a list of available plans, including your newly activated eSIM plan. Select your eSIM plan as the default primary plan, and your iPhone 14 will seamlessly switch over to using the eSIM for all your cellular needs.
Troubleshooting Common eSIM Installation Issues
While installing an eSIM on your iPhone 14 is a straightforward process, you may encounter some common issues along the way. Here are some troubleshooting steps to help you overcome these challenges.
Unable to Scan QR Code
- Ensure good lighting and clean your camera lens
- Try adjusting the QR’s position, ensure there are no obstructions or reflections
- Restart your device and try again
- If it still doesn't work, try the manual entry option
eSIM Not Showing Up
- Make sure your iPhone is updated to the latest software
- Try restarting your phone
- Contact your carrier or eSIM provider for support
Frequently Asked Questions (FAQs)
What do I need before installing an eSIM on iPhone 14?
You'll need an eSIM-compatible iPhone 14, a stable internet connection, and either a QR code or manual details (SM-DP+ address and activation code) from your carrier or eSIM provider.
Can I install multiple eSIMs on my iPhone 14?
Yes, iPhone 14 supports multiple eSIM profiles, although only one (or two, depending on model) can be active at a time. You can easily switch between them in your settings.
Does iPhone 14 support dual SIM?
Yes. Depending on your model, iPhone 14 supports one physical SIM and one eSIM, or two active eSIMs if it’s an eSIM-only model (e.g. U.S. iPhone 14).
What happens to my physical SIM if I activate an eSIM?
Your physical SIM will continue to work unless you choose to disable it. You can configure which SIM is used for calls, texts, and data.
Is it safe to use eSIM while traveling?
Absolutely. eSIMs are secure and ideal for travel — they reduce the hassle of buying local SIMs and allow you to switch between data plans with ease.
Can I transfer my eSIM from an old iPhone to iPhone 14?
Yes. Use Apple’s Quick Transfer if both devices support iOS 16+, or contact your provider to transfer the plan manually.
Maximizing the eSIM Experience on Your iPhone 14
Switching Between eSIM and Physical SIM
If you are on an iPhone 14 that still has a physical SIM tray, you can install both a physical SIM and an eSIM. You can easily switch between them by selecting the desired profile you want to use for your cellular and/or data connectivity.
Switching Between eSIMs
Even if you are already using an eSIM for your primary line, you can still install additional eSIM profiles and easily switch between the different profiles. When you travel, simply install an eSIM for your destination country, and choose that new eSIM as the one to be used for your data usage.
Mastering eSIM Setup on iPhone 14 Sets You Up for Seamless Global Connectivity
Installing an eSIM on your iPhone 14 is easier than it may seem — and offers a flexible, future-ready way to stay connected wherever you are. Whether you’re scanning a QR code, entering details manually, transferring from another iPhone, or setting it up via your carrier, the process is designed to be smooth and user-friendly.
Once set up, you can easily switch between lines, manage multiple plans, and stay in control of your connectivity — at home or while traveling. With Apple and carriers moving more aggressively toward eSIM-only support, getting familiar with the process now ensures you’re ready for what’s ahead.