eSIM
What Is an SM-DP+ Address? A Simple Guide to Manual eSIM Activation
Learn what an SM-DP+ address is, why it’s essential for eSIM activation, and how to use it for manual installation when QR codes aren’t an option.
If you’ve looked into how eSIMs work, you may have seen the term “SM-DP+ address” and wondered what it means. While it sounds technical, it’s actually a core part of activating an eSIM on your phone, especially when setting it up manually.
This guide explains what an SM-DP+ address is, why it matters, and how Nomad makes eSIM activation quick and easy.
Decoding the SM-DP+ Address: The Backbone of eSIM Provisioning
SM-DP+ stands for Subscription Manager Data Preparation Plus. It’s the secure server address your phone contacts to download your eSIM profile.
Think of it as the digital “home” where your eSIM plan lives until it’s installed on your device.

Why is the SM-DP+ Address Important for eSIM Activation?
The SM-DP+ address plays a critical role in how your phone connects to the mobile network. It enables:
- Secure profile delivery to your device
- Authentication to verify the device and plan
- Remote provisioning (so you don’t need a physical SIM)
- Manual installation when a QR code isn’t available or doesn’t work
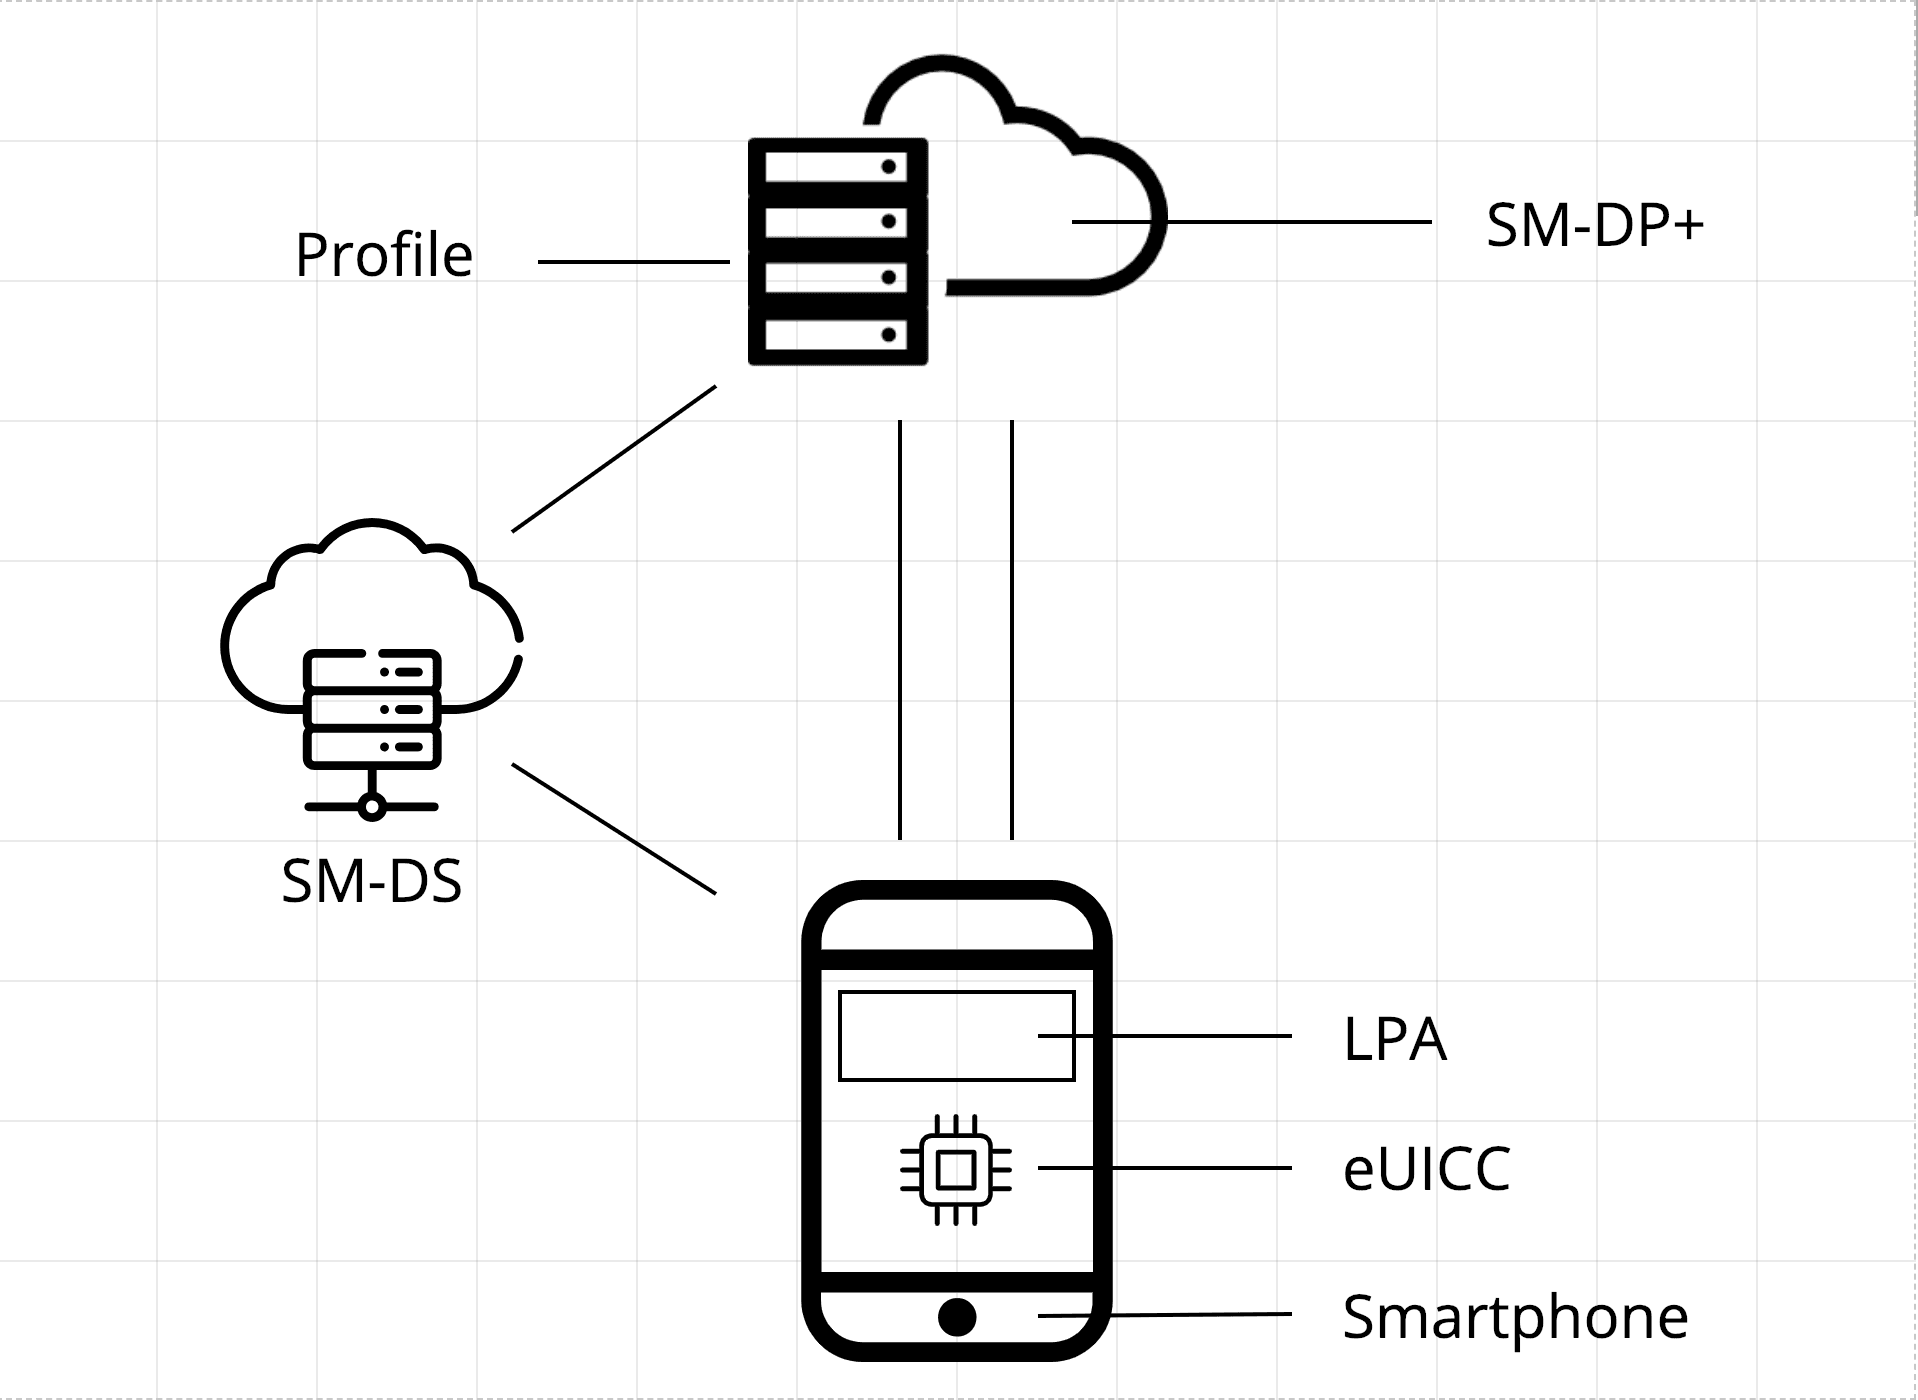
How It Works: eSIM Activation via SM-DP+
Here’s a simple overview of how your phone uses the SM-DP+ address to activate an eSIM:
- You start setup (via QR code or manual entry)
- Your phone contacts the SM-DP+ server
- The server authenticates your device and plan
- The eSIM profile is securely downloaded and installed
- Your mobile connection is activated
Essentially, the SM-DP+ address acts as the digital bridge that connects your device to the eSIM infrastructure, allowing for the seamless and secure transfer of your mobile plan.
When You’ll Need to Enter an SM-DP+ Address
Most Nomad users activate eSIMs by scanning a QR code. But manual setup may be required in cases like:
- No QR code provided (for some regions or plans)
- QR code won’t scan due to camera issues or print quality
- Older devices with limited QR support
- Troubleshooting with customer support
How to Manually Install an eSIM Using SM-DP+
The process for manual eSIM installation varies slightly between iOS and Android devices. Before you begin, ensure you have a stable internet connection (Wi-Fi is recommended) and the SM-DP+ address and activation code provided by your eSIM provider.

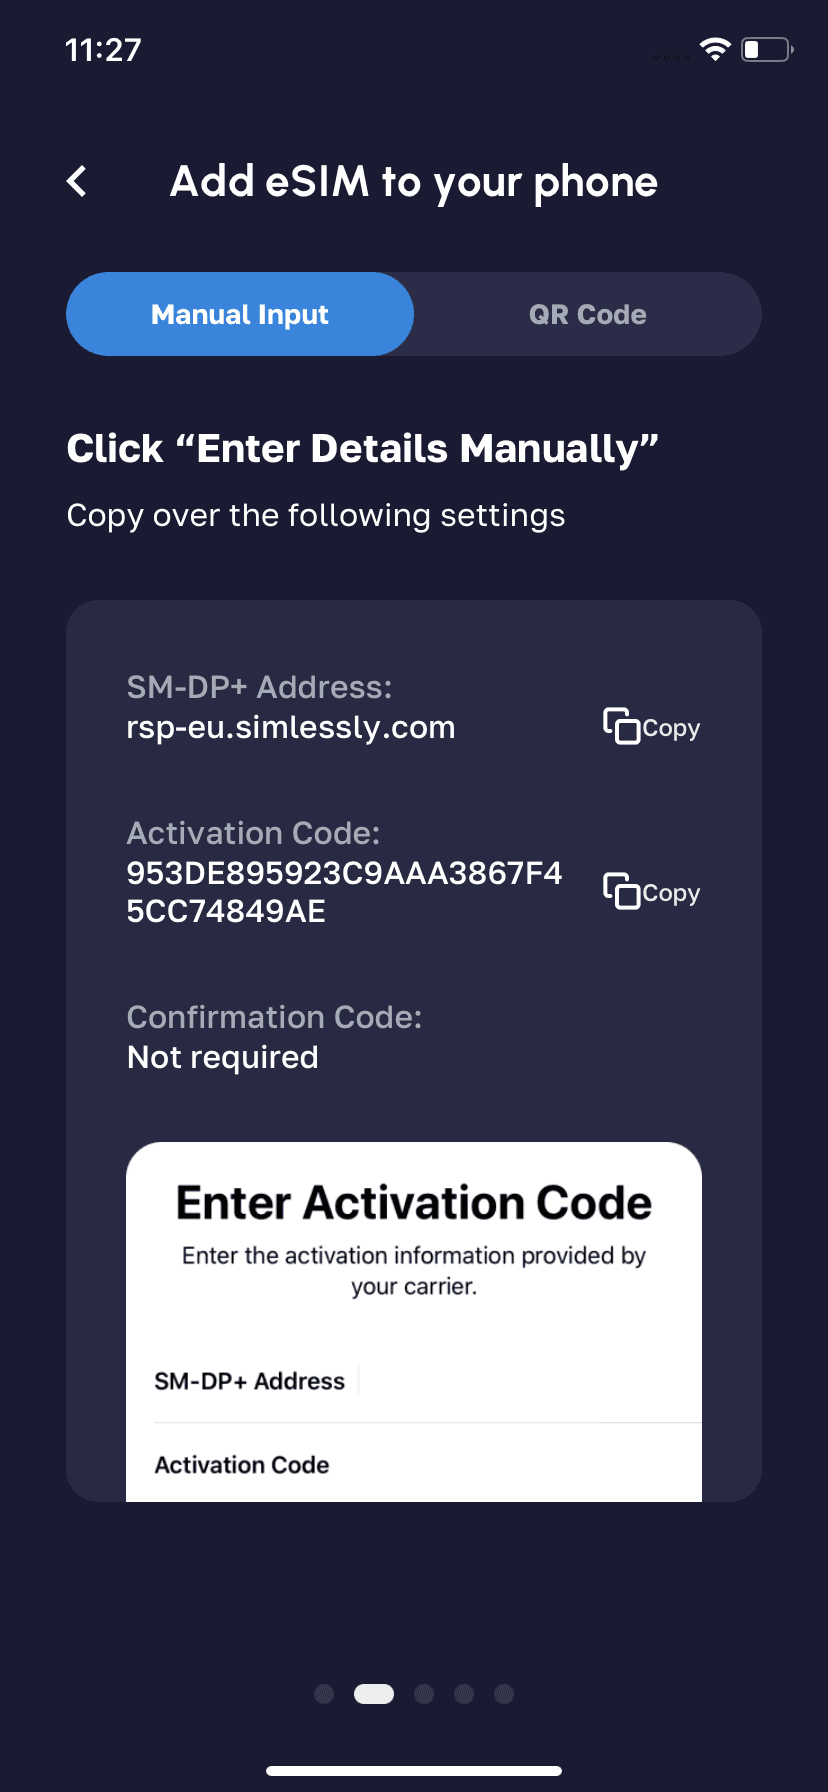
For iPhone/iOS Users:
- Go to Settings > Cellular
- Tap Add eSIM or Add Cellular Plan
- Select Enter Details Manually
- Input the SM-DP+ Address and Activation Code
- Follow prompts to complete setup
For Android Users:
- Go to Settings > Network & Internet > Mobile Network
- Tap Add eSIM or Carrier
- Select Use a different way or Enter manually
- Enter the SM-DP+ Address and Activation Code
- Complete the prompts to finish installation
Note: Menu names may vary depending on your phone model and Android version.
Where to Find Your SM-DP+ Address
You’ll get this info directly from your eSIM provider. It’s usually included in:
- Order confirmation emails
- Your account dashboard (web or app)
- Help center/FAQs if the provider uses a universal address
Always copy and paste the address and code exactly—they’re case-sensitive.
[H2] Troubleshooting Common SM-DP+ Address Issues Common problems and how to fix them:
- “Invalid Address” or Code: Double-check for typos
- No Internet: You need Wi-Fi or mobile data to download the eSIM
- Device not supported: Check if your phone is eSIM compatible
- Still stuck? Contact your provider’s support team for help
Nomad: Simplifying Your eSIM Experience
With Nomad, most users activate eSIMs in minutes just by scanning a QR code. But if you ever need to set things up manually, we provide your SM-DP+ address and activation code right in your order confirmation and dashboard.
We simplify global connectivity so you can skip the hassle and stay online wherever you go.
Frequently Asked Questions About SM-DP+ and eSIM Setup
What is an SM-DP+ address used for?
It’s a secure server address that helps deliver your eSIM profile to your device during manual setup.
When do I need to enter an SM-DP+ address manually?
If your QR code doesn’t work or isn’t provided, your eSIM provider will give you the SM-DP+ address and activation code for manual input.
Where can I find my SM-DP+ address?
Check your order confirmation email, account dashboard, or eSIM provider’s support page. Nomad includes it in every manual setup guide.
What if my SM-DP+ code doesn’t work?
Double-check for typos, ensure you’re online, and confirm device compatibility. If issues persist, contact your eSIM provider’s support team.


Conclusion: Empowering Your eSIM Journey
The SM-DP+ address is a fundamental component of the eSIM ecosystem, acting as the secure gateway for your digital SIM profile. While it might seem like a technical detail, understanding its role empowers you to troubleshoot and manually activate your eSIM when needed. With providers like Nomad simplifying the process, you can enjoy the unparalleled convenience and flexibility of eSIM technology, ensuring you stay connected wherever your travels take you.
Want to skip the tech headache and get connected in minutes? Try Nomad’s easy eSIM setup with instant activation and zero physical SIM cards.