eSIM
Installing eSIM: Seamless Nomad eSIM Setup with iOS 17
Revolutionizing Connectivity: iOS 17's Seamless eSIM Setup Experience
Last Friday marked the worldwide release of the highly anticipated iPhone 15, reaffirming Apple's commitment to innovation, technological advancement and exclusively using eSIM technology in the US.
In line with this spirit of progress, iOS 17 has introduced substantial improvements that promise to elevate travelers, digital nomads, and other users' connectivity experience with an easier way to install eSIMs for their trips.
No More QR Code Scanning Hassles
The easiest way to install an eSIM is through scanning the QR code that your provider gives to you. However, this could be troublesome if you only had one device, and don't have a second screen that you can use to display the QR code. With the lack of a second screen, some users may decide to install the eSIM using manual input instead.
For users with iOS 17 and newer, you can now say goodbye to this problem! No more manually inputting the activation code, or looking for a second screen to display your eSIM's QR code.

Please Note - Users with older iOS versions will continue to require manual eSIM activation or scanning the QR code from their another device when on the move.
Effortless Nomad eSIM Installation
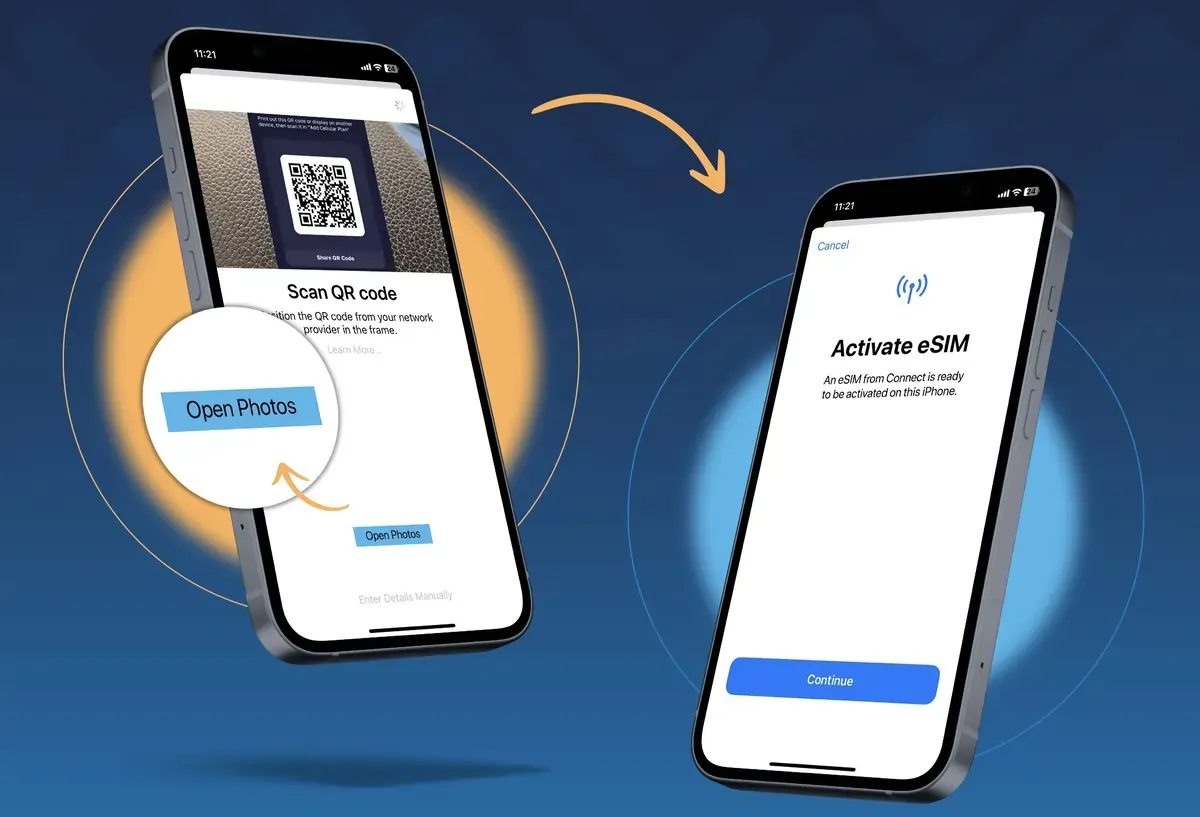
Setting up an eSIM is now a breeze. The days of painstakingly entering codes or relying on additional devices to scan QR codes are gone. You can seamlessly follow these straightforward steps:
- Screenshot the eSIM QR code from the Nomad App
- Go to Settings > Cellular > Add eSIM > Use QR code > Open Photos
- Select the QR code screenshot from the Camera Roll
Please note that a stable internet connection is required to install your eSIM. It is recommended that you install your eSIM ahead of time. Not to worry if you are not using your data yet - installing your eSIM simply adds your eSIM to your device, and does not start the validity of the eSIM.
The Final Step - Activating Nomad eSIM
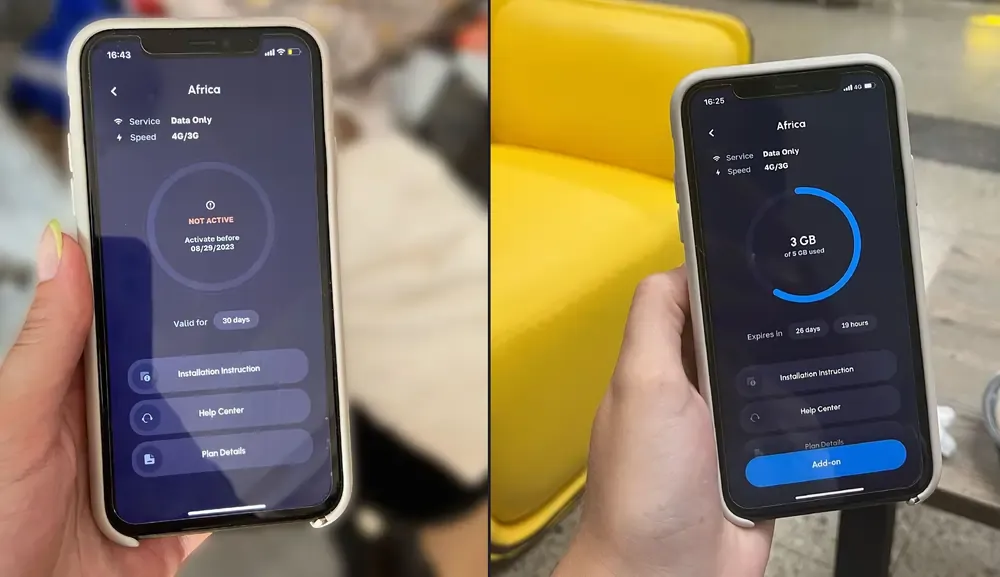
When you are ready to use your eSIM, you will need to activate it. eSIM activation requires you to have a stable internet connection. Activation of the eSIM will start its validity, so it is recommended that you activate it right before you fly, while you still have a stable connection.
In some cases, manual activation is not required, and the eSIM will be automatically activated when you arrive at the destination and your eSIM hooks onto the local network. For more information on how to activate your eSIM, please check the installation email that is sent to you after you purchase your plan.
It may take up to 20 minutes for the data plan to be shown as activated in the app. However, you can start using your data immediately after clicking the activation button within the Nomad App!

Explore The World with Nomad's Coverage in 200+ Countries
If you're tired of dealing with costly roaming charges and the hassle of changing SIM cards while traveling, worry not – Nomad has you covered!
Discover the convenience of Nomad eSIM, offering coverage in over 200 countries! Before your trip, simply select the data plan that suits your travel duration and data needs. Upon arrival, activate it within the Nomad app for instant connectivity – a quick and seamless process that takes less than five minutes.
The Nomad app is available on both the App Store and Google Play Store, making it easily accessible for all. Get ready to explore the world and travel like a local with Nomad eSIM!